> ## Documentation Index
> Fetch the complete documentation index at: https://documentation.outpost.pub/llms.txt
> Use this file to discover all available pages before exploring further.

# Events

> Create webinars, in-person events, and virtual events with member registration, attendee tracking, calendar links, and Ghost CMS integration.

export const PlanStatus = ({tier, status, beta, deprecated}) => {
  const variants = {
    luna: {
      bg: "#8340B9",
      color: "#ffffff",
      border: "1px solid #8340B9"
    },
    voyager: {
      bg: "#6B2FA0",
      color: "#ffffff",
      border: "1px solid #6B2FA0"
    },
    "space-station": {
      bg: "transparent",
      color: "#8340B9",
      border: "1px solid #8340B9"
    },
    "all-plans": {
      bg: "transparent",
      color: "#525252",
      border: "1px solid #a3a3a3"
    },
    labs: {
      bg: "transparent",
      color: "#a16207",
      border: "1px solid #a16207"
    },
    beta: {
      bg: "transparent",
      color: "#a16207",
      border: "1px solid #a16207"
    },
    "invite-only": {
      bg: "transparent",
      color: "#525252",
      border: "1px solid #a3a3a3"
    },
    bespoke: {
      bg: "transparent",
      color: "#525252",
      border: "1px solid #a3a3a3"
    },
    "outpost-hosted": {
      bg: "transparent",
      color: "#525252",
      border: "1px solid #a3a3a3"
    },
    deprecated: {
      bg: "transparent",
      color: "#b91c1c",
      border: "1px solid #b91c1c"
    }
  };
  const chip = (variant, label) => {
    const s = variants[variant] || variants["all-plans"];
    return <span key={variant + ":" + label} style={{
      display: "inline-flex",
      alignItems: "center",
      padding: "0.15rem 0.55rem",
      fontSize: "0.7rem",
      fontWeight: 700,
      letterSpacing: "0.05em",
      textTransform: "uppercase",
      borderRadius: "3px",
      lineHeight: 1.4,
      whiteSpace: "nowrap",
      backgroundColor: s.bg,
      color: s.color,
      border: s.border
    }}>
        {label}
      </span>;
  };
  const tierLabel = {
    "luna": "Luna",
    "voyager+": "Voyager+",
    "voyager-luna": "Voyager + Luna",
    "space-station+": "Space Station+",
    "all-plans": "All plans"
  };
  const tierVariant = {
    "luna": "luna",
    "voyager+": "voyager",
    "voyager-luna": "voyager",
    "space-station+": "space-station",
    "all-plans": "all-plans"
  };
  const statusLabel = {
    "labs": "Labs",
    "invite-only": "Invite-only",
    "bespoke": "Bespoke",
    "deprecated": "Deprecated",
    "outpost-hosted": "Outpost Hosted"
  };
  return <span style={{
    display: "inline-flex",
    gap: "0.4rem",
    flexWrap: "wrap",
    alignItems: "center",
    margin: "0 0 1.25rem 0"
  }}>
      {tier && chip(tierVariant[tier], tierLabel[tier])}
      {status && chip(status, statusLabel[status])}
      {beta && chip("beta", "Beta")}
      {deprecated && chip("deprecated", "Deprecated")}
    </span>;
};

<PlanStatus tier="luna" status="labs" beta />

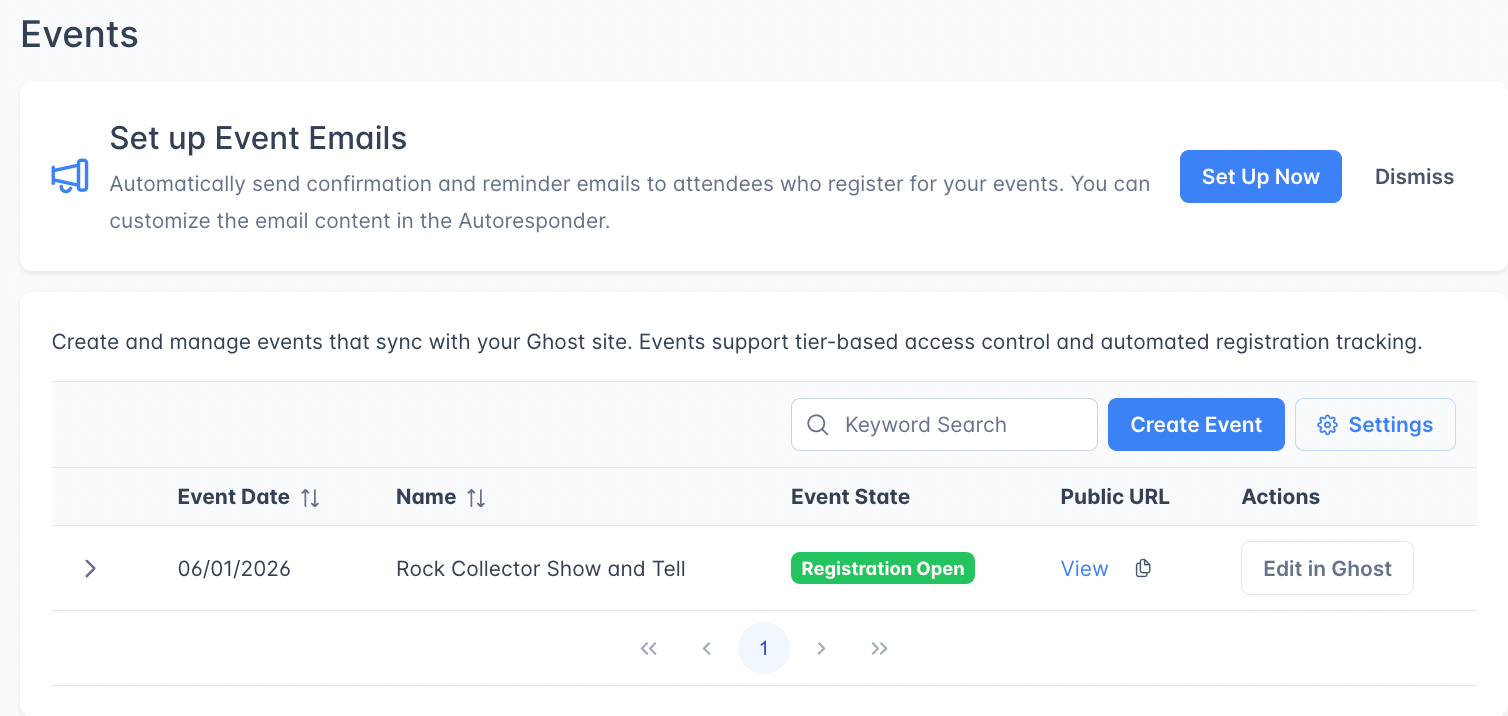
Outpost Events lets you create events that members register for directly on your Ghost site. Events are managed in the Outpost dashboard and published to Ghost as posts with an embedded registration widget.

<Frame>
  <img src="https://mintcdn.com/outpost-eb0cfbad/nT8DH9mXPGAXwJmg/images/EventsBetadash.png?fit=max&auto=format&n=nT8DH9mXPGAXwJmg&q=85&s=618d4adf9f0e14ec63b1294509e91234" alt="Screenshot of Events Beta in Labs" width="1508" height="716" data-path="images/EventsBetadash.png" />
</Frame>

This flow handles webinars, in-person events, virtual meetups, and any other registration-driven event your publication runs.

<Frame>
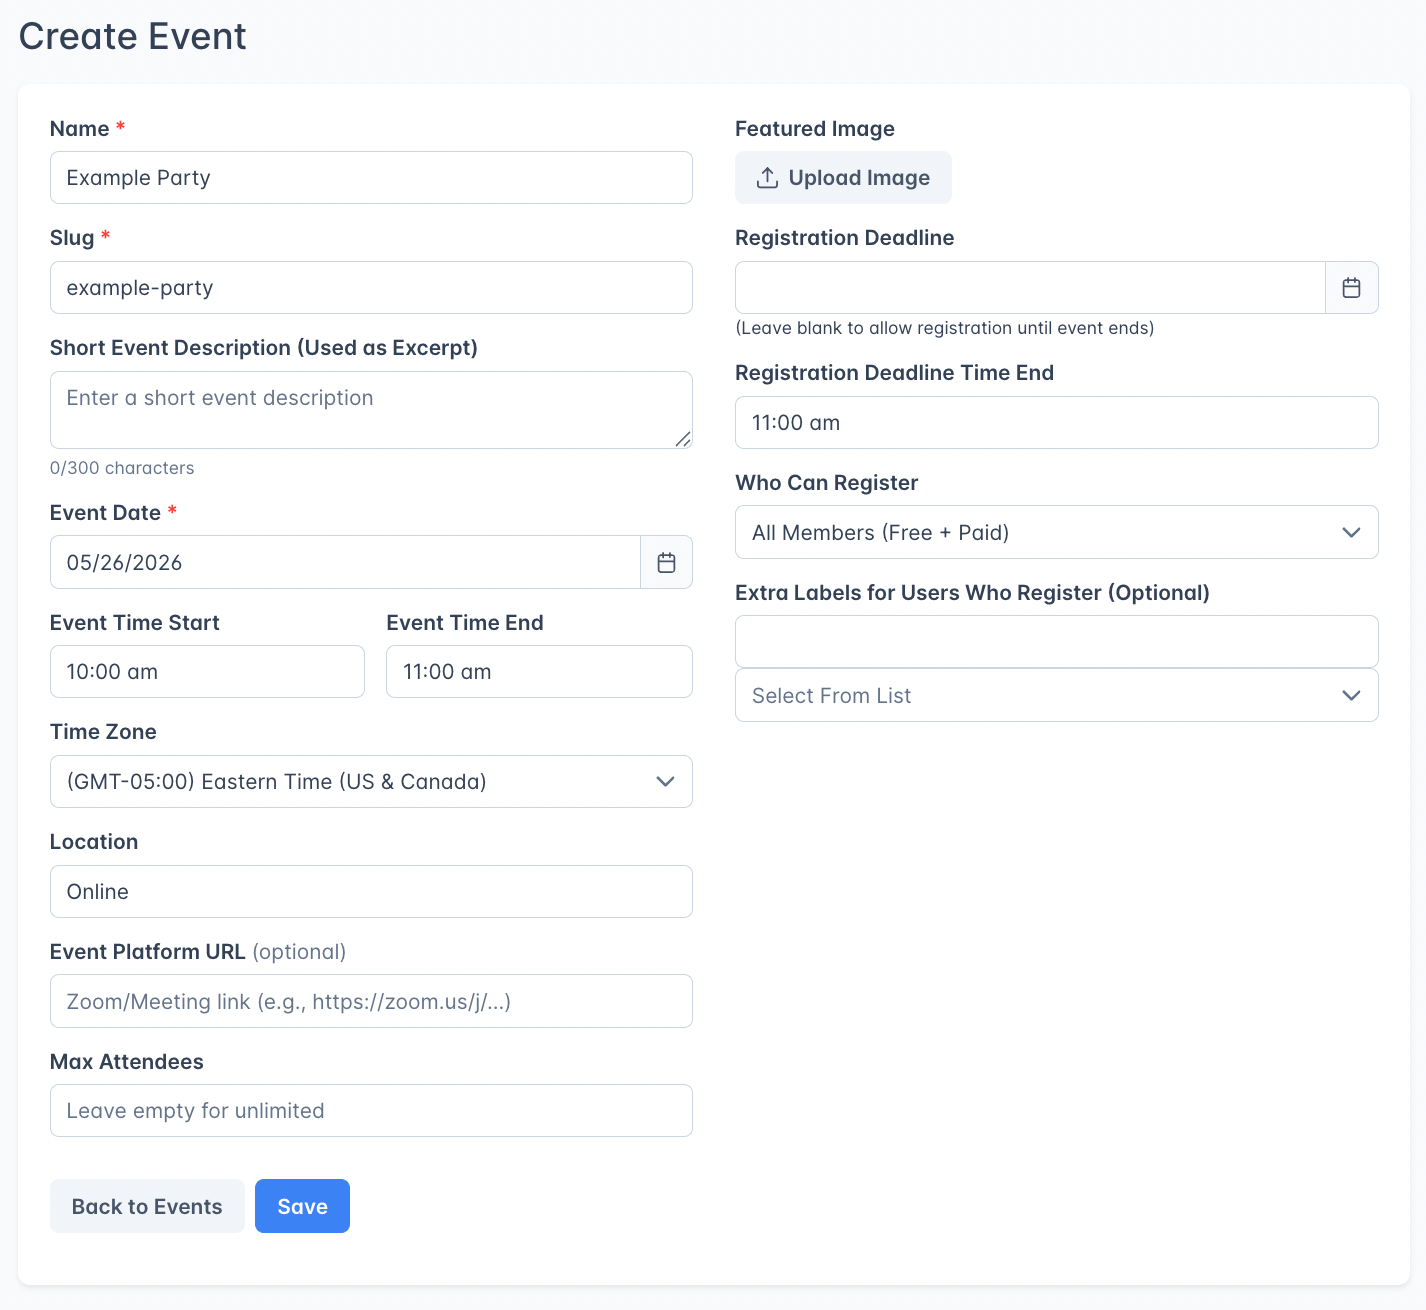
  <img src="https://mintcdn.com/outpost-eb0cfbad/LyBU8PPD_sDXJaJW/images/Events2.png?fit=max&auto=format&n=LyBU8PPD_sDXJaJW&q=85&s=e7910acb4ec609e1f77bdc4d98327880" alt="Screenshot of Events Beta entry" width="1426" height="1310" data-path="images/Events2.png" />
</Frame>

***

## How to

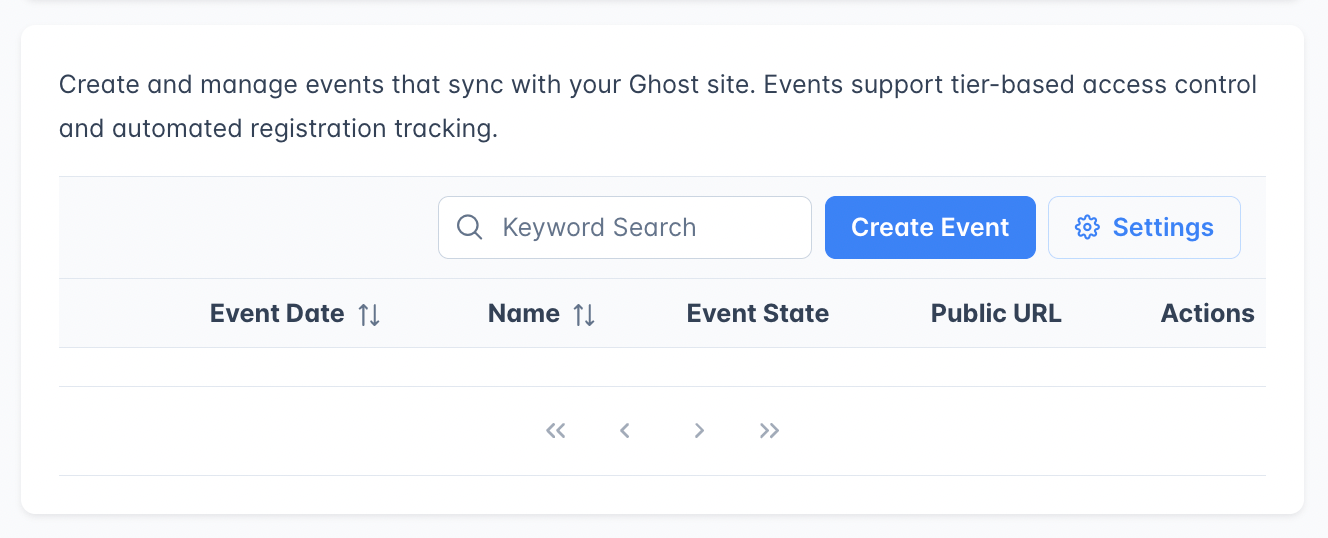
1. **Create** an event in the Outpost dashboard by clicking the blue Create Event button. Fill in a name, date, time, and access settings (including link and image if applicable). **Save**, then the Create Draft Post in Ghost button will appear. This will open a draft post with an embedded registration code.
   <Frame>
     <img src="https://mintcdn.com/outpost-eb0cfbad/LyBU8PPD_sDXJaJW/images/EventCreatorDraftPostButton.png?fit=max&auto=format&n=LyBU8PPD_sDXJaJW&q=85&s=7300dc4a30c7167405a7c87228be7fc1" alt="Event Creator Draft Post Button" width="912" height="178" data-path="images/EventCreatorDraftPostButton.png" />
   </Frame>
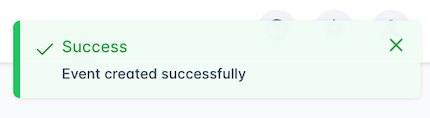
   You should see confirmation in the top right corner after saving:
   <Frame>
     <img src="https://mintcdn.com/outpost-eb0cfbad/nT8DH9mXPGAXwJmg/images/Eventsuccess.png?fit=max&auto=format&n=nT8DH9mXPGAXwJmg&q=85&s=3945fa74632135c6133d06c4cbfcc108" alt="Confirmation of saved event" width="430" height="118" data-path="images/Eventsuccess.png" />
   </Frame>
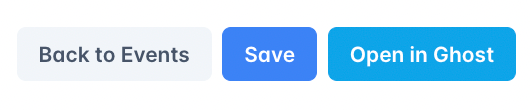
   After saving, the "Create Draft Post" button will change into one that opens the draft page in a new tab:
   <Frame>
     <img src="https://mintcdn.com/outpost-eb0cfbad/nT8DH9mXPGAXwJmg/images/EventsGhostDraftButton.png?fit=max&auto=format&n=nT8DH9mXPGAXwJmg&q=85&s=70f5aa7aac742b21747c358640bc782f" alt="Button to open draft post in Ghost" width="530" height="110" data-path="images/EventsGhostDraftButton.png" />
   </Frame>
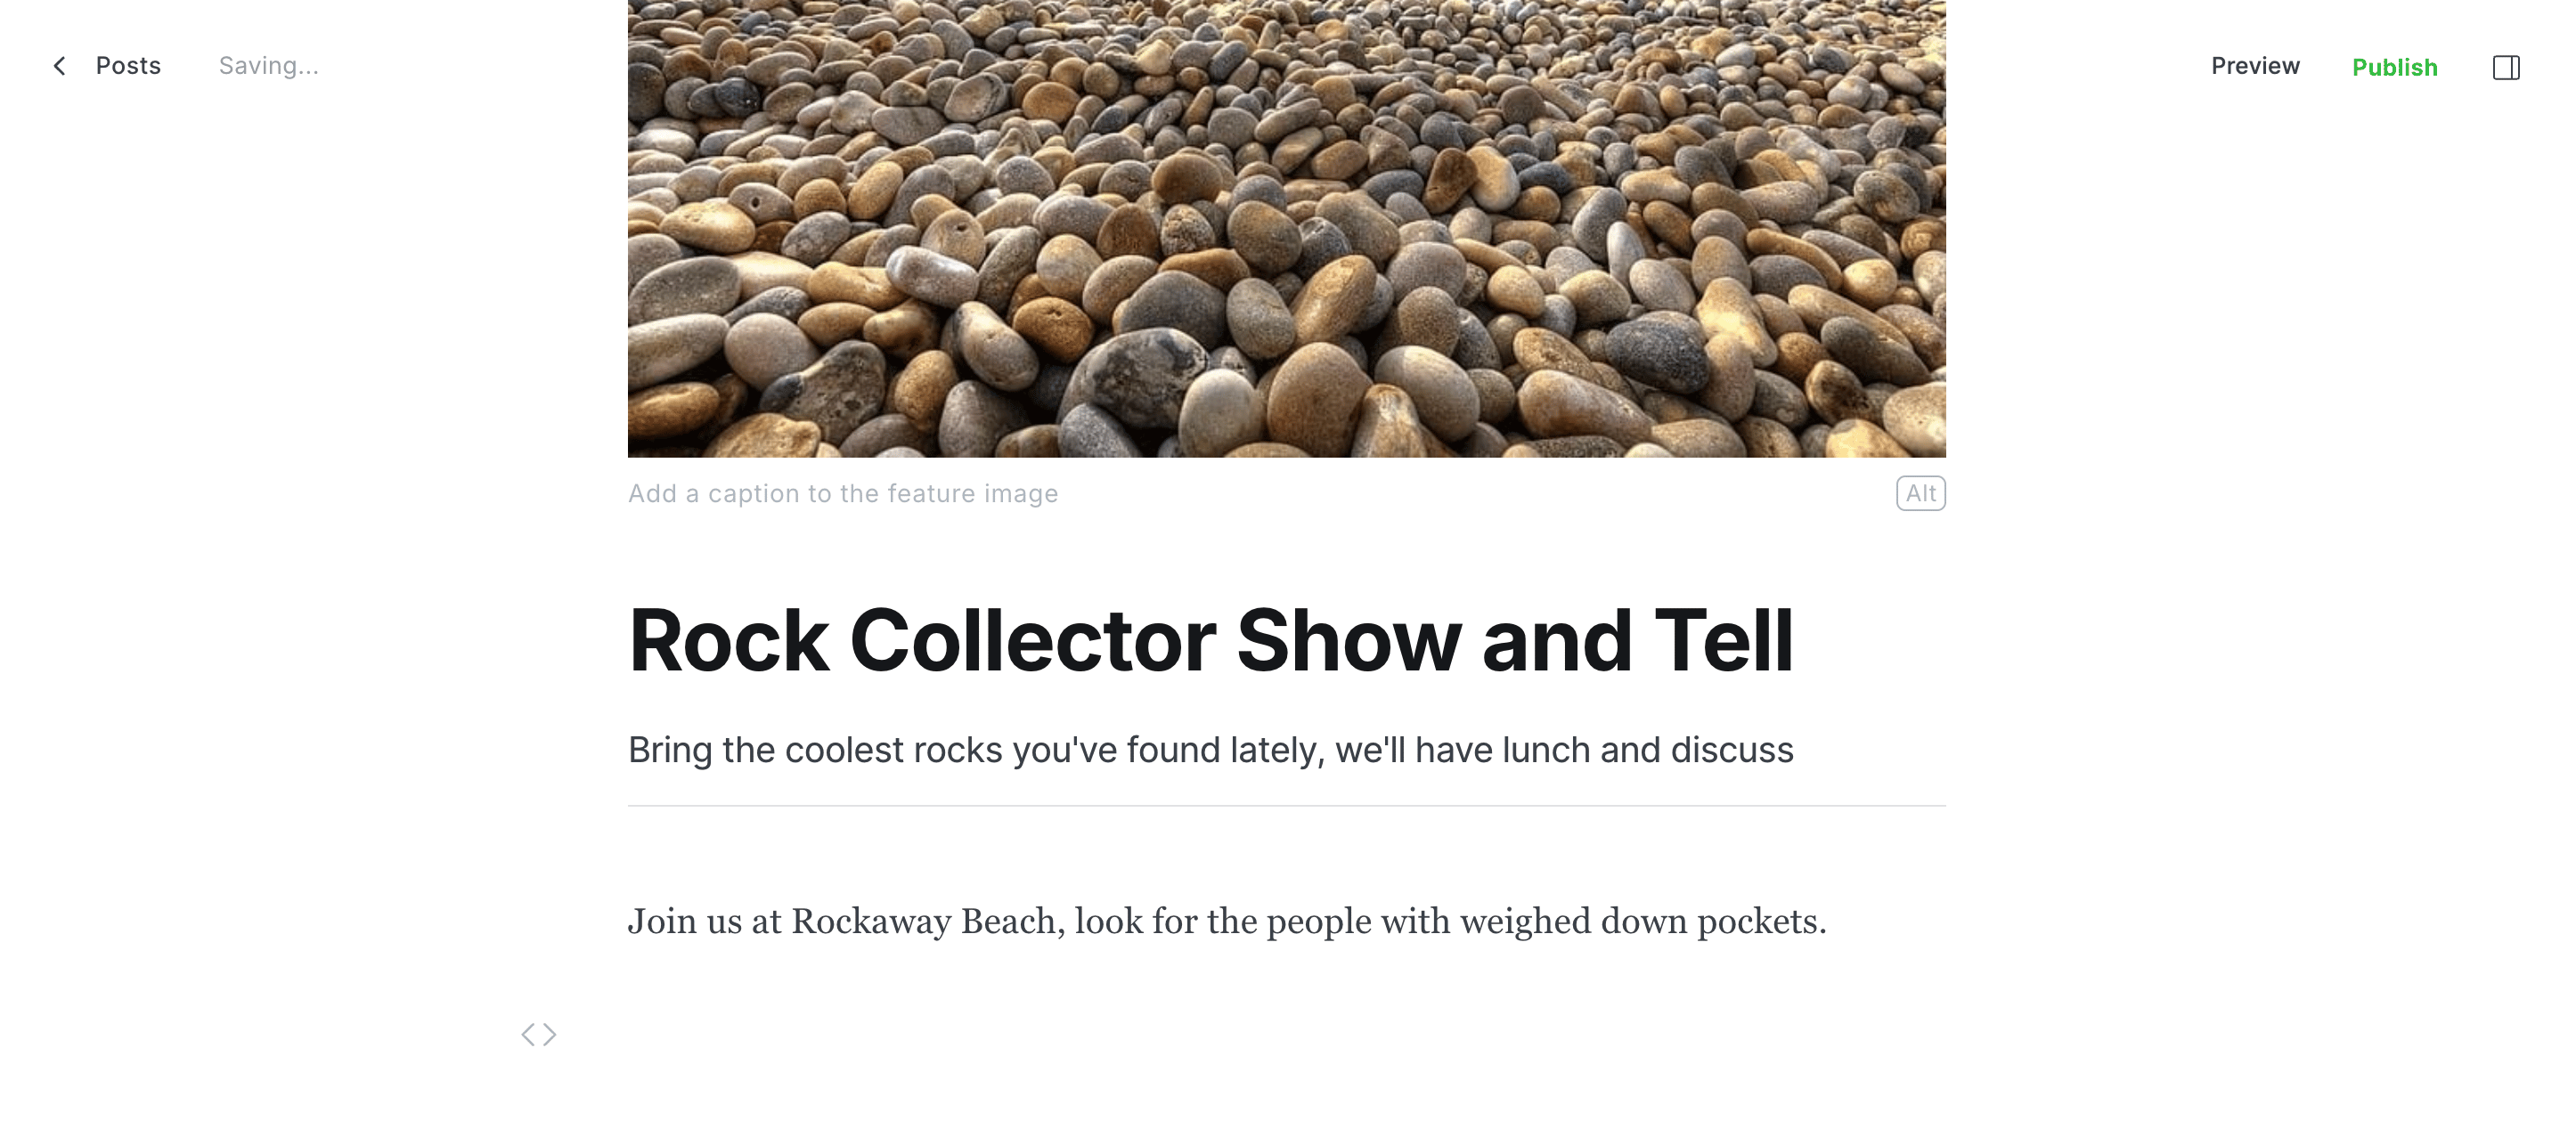
2. **Publish** to Ghost: Fill in any additional information you would like to share with your readers in the draft post that's created, then publish to Ghost.
   <Frame>
     <img src="https://mintcdn.com/outpost-eb0cfbad/nT8DH9mXPGAXwJmg/images/EventsDraft.png?fit=max&auto=format&n=nT8DH9mXPGAXwJmg&q=85&s=52f6fab6686c60e5c3fa40956bced9c9" alt="Events Draft Post" width="2892" height="1268" data-path="images/EventsDraft.png" />
   </Frame>
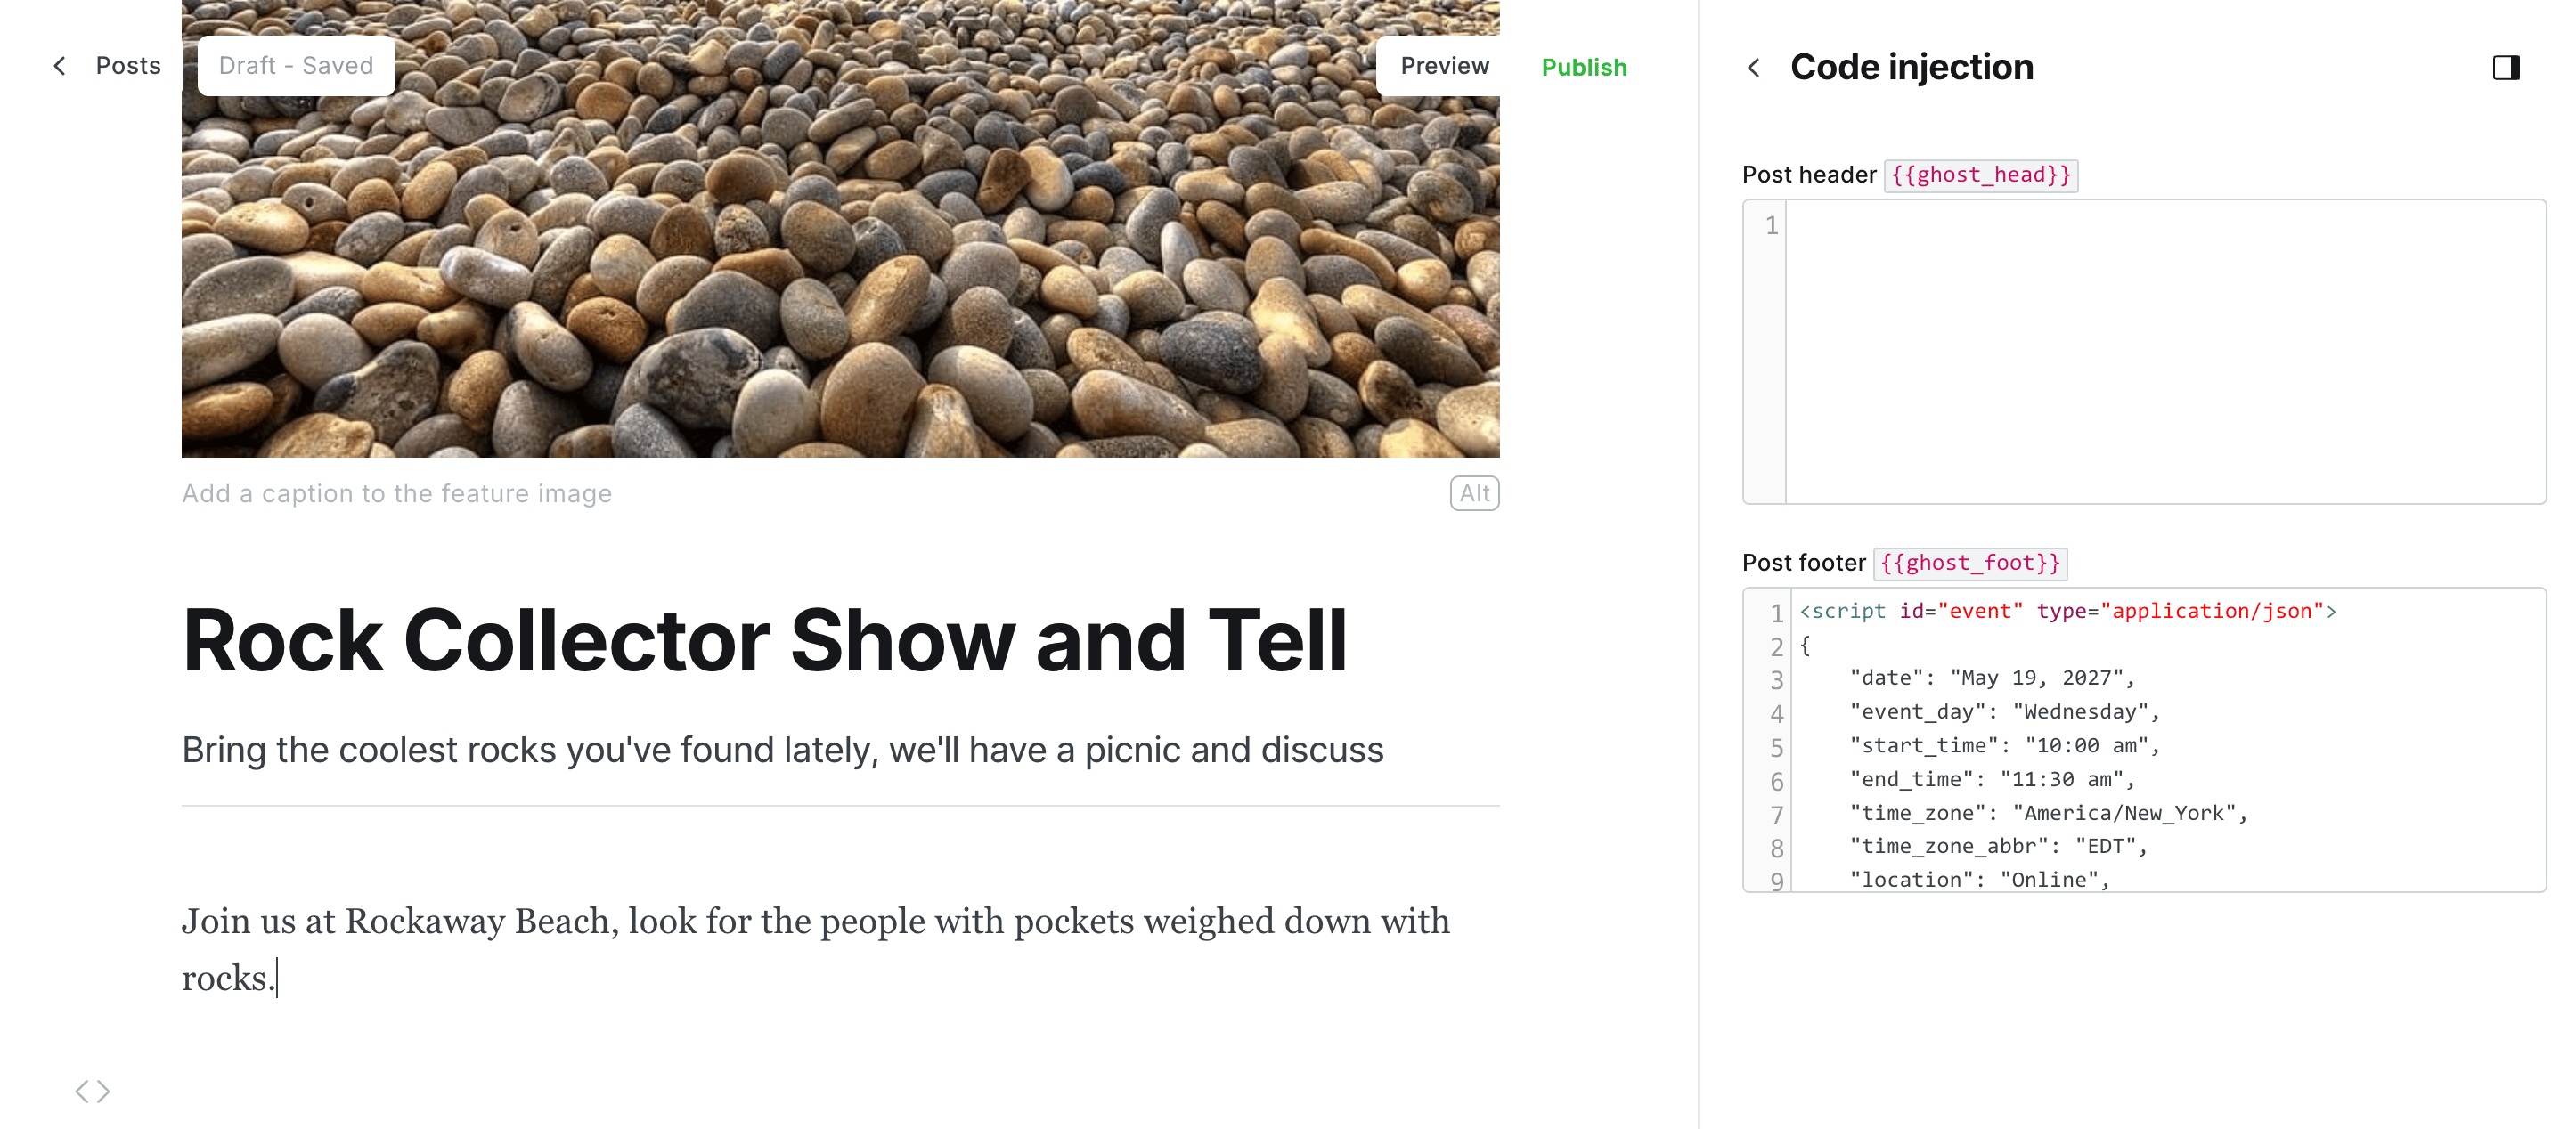
   Note: It may not look like your event is there in the draft post of editor, but you can see the information you entered in your OCC is being stored in the Code Injection section of the post to be displayed in your event widget after publishing (if you've made changes to your template to display events).
   <Frame>
     <img src="https://mintcdn.com/outpost-eb0cfbad/nT8DH9mXPGAXwJmg/images/EventsCodeInjection.png?fit=max&auto=format&n=nT8DH9mXPGAXwJmg&q=85&s=5693e4dd3369790a4709737e92d81917" alt="Events Code Injection" width="2892" height="1268" data-path="images/EventsCodeInjection.png" />
   </Frame>
3. **Members register** via the on-page widget, which handles login, access checks, and RSVP.
4. **Calendar links** appear after registration so attendees can save the event.
5. **Attendee tracking** records registrations and cancellations.
6. **Event countdown** displays a live countdown to the event start time.

***

## Creating an event

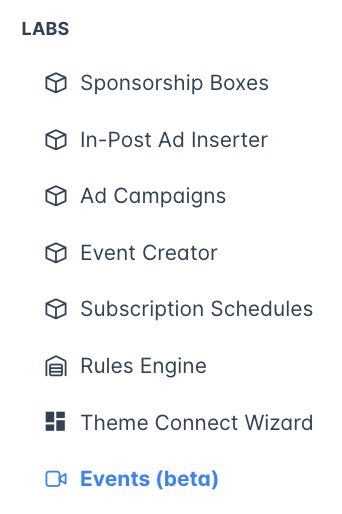
Go to **Events (beta)** under the Labs group in the left navigation (pictured below) and click **Create Event**.

<Frame>
  <img src="https://mintcdn.com/outpost-eb0cfbad/nT8DH9mXPGAXwJmg/images/EventsBetaLabsMenu.png?fit=max&auto=format&n=nT8DH9mXPGAXwJmg&q=85&s=466622ff1ab5625469faecae26b181f9" alt="Events Beta in the Outpost Labs Menu" width="342" height="514" data-path="images/EventsBetaLabsMenu.png" />
</Frame>

<Frame>
  <img src="https://mintcdn.com/outpost-eb0cfbad/nT8DH9mXPGAXwJmg/images/Events3.png?fit=max&auto=format&n=nT8DH9mXPGAXwJmg&q=85&s=ca3a5c7e5e697c2d9e0d7c0acdcfafc7" alt="Create event button" width="1328" height="538" data-path="images/Events3.png" />
</Frame>

<Tip>
  If your theme defines event types (e.g., "In-Person", "Webinar", "Virtual"), you'll select the type first; this determines which fields and settings are available.
</Tip>

### Event details

| Field                  | Description                                                                                                                                                                                                                                                                                                         |
| ---------------------- | ------------------------------------------------------------------------------------------------------------------------------------------------------------------------------------------------------------------------------------------------------------------------------------------------------------------- |
| **Name**               | The event title. Required.                                                                                                                                                                                                                                                                                          |
| **Slug**               | Auto-generated from the name when you first save. Locked after that: the on-page Slug field is the event's permanent identifier and won't change if you rename the event later.                                                                                                                                     |
| **Short Description**  | Optional excerpt displayed in event listings.                                                                                                                                                                                                                                                                       |
| **Event Date**         | The date of the event. Required. A new event opens with a date one week out.                                                                                                                                                                                                                                        |
| **Start Time**         | When the event starts. Required. Pick the hour, minute, and AM or PM from the time picker. A new event opens at 10:00 AM.                                                                                                                                                                                           |
| **End Time**           | When the event ends, chosen from the same time picker. Optional: if blank, Outpost falls back to the start time when deciding whether the event has passed. A new event opens at 11:00 AM.                                                                                                                          |
| **Time Zone**          | Choose from all major IANA time zones. A new event is pre-filled with your site's time zone, set under **Account → Publication Details** (see [Publication Details](/features/publication-details)). Change it here to give a single event a different zone. Events you saved earlier keep the zone stored on them. |
| **Location**           | Where the event takes place (e.g., "Online", a venue name).                                                                                                                                                                                                                                                         |
| **Event Platform URL** | Optional link to the event platform (e.g., Zoom).                                                                                                                                                                                                                                                                   |
| **Max Attendees**      | Optional cap on registrations. Leave blank for unlimited.                                                                                                                                                                                                                                                           |

### Registration settings

| Field                                                | Description                                                                                                                                                                                                                                                               |
| ---------------------------------------------------- | ------------------------------------------------------------------------------------------------------------------------------------------------------------------------------------------------------------------------------------------------------------------------- |
| **Featured Image**                                   | Upload an event image, crop it in the **Crop Image** dialog, and click **Apply**. Once an image is set, **Replace image** sits next to **Remove Image**, so you can swap in a new file without removing the old one first. Files must be images and under 5 MB.           |
| **Registration Deadline**                            | Optional date after which new registrations are blocked. Leave it blank to allow registration until the event ends.                                                                                                                                                       |
| **Registration Deadline Time End**                   | The time of day the deadline falls on, chosen from a time picker. A new event opens at 11:00 AM.                                                                                                                                                                          |
| **Who Can Register**                                 | Three options: **All Members (Free + Paid)**, **Free Members Only**, or **Paid Subscribers Only**.                                                                                                                                                                        |
| **Extra Labels for Members Who Register (Optional)** | Labels applied to every member who registers. When you first save the event, Outpost adds its own RSVP label to this field, where you can see it and remove it if you don't want it. Add any other labels you want registrants to carry. See [RSVP labels](#rsvp-labels). |

A **Recommended size** line sits under the Featured Image field, and the same line appears inside the crop dialog. Outpost takes that size from the first of these that is set: the featured image constraint in your [theme manifest](/themes/manifest-reference#field-constraints), then **Event Settings → Default Featured Image Size**, then a built-in 1200 x 630px. The recommendation now always shows, even when neither of the first two is configured.

***

## Editing an event

Every event has its own page. Click **Edit** on any row of the Events list to open it. A breadcrumb trail above the form shows where you are: **Events**, then **New event** while you're creating one, or the event's name once it has been saved. Click **Events** in the trail to return to the list.

Saving a new event takes you to that event's own page, and the browser address, breadcrumb, and page title update to match.

The editor also does the following:

* **Cmd+S saves the event.** Ctrl+S does the same on Windows.
* **Unsaved edits are protected.** Leaving the page with changes you haven't saved raises a **Leave without saving?** confirmation, offering **Keep editing** or **Discard changes**. Closing the browser tab raises your browser's own leave-this-page warning instead.
* **Errors appear next to the field that caused them.** If a required value is missing, the message appears under that field and the page scrolls to it. When publishing to Ghost fails, the reasons are attached to the fields they belong to, and anything that doesn't belong to a field appears as a notification instead.

### Post address

As soon as a Ghost post exists for the event, a **Post address** line appears on the event page showing the address the post will have. Until the post is published, that address is plain text with a **Not live yet** tag beside it. Once the post is live, the same line becomes a working link.

The copy button next to it works in both states, so you can put the address into a newsletter or an invitation ahead of publishing.

***

## Events list

The Events page lists every event you have created, with columns for **Event Date**, **Name**, **Event State**, **Ghost Post**, and **Actions**. The **Ghost Post** column tracks where the event's post stands in Ghost:

| State           | What it means                                       | What to do next                                                        |
| --------------- | --------------------------------------------------- | ---------------------------------------------------------------------- |
| **Not created** | The event has no Ghost post yet.                    | Click **Create Draft Post in Ghost** in the Actions column.            |
| **Draft**       | The post exists in Ghost but hasn't been published. | Click **Finish in Ghost** to open it in the Ghost editor.              |
| **Published**   | The post is live on your site.                      | Click **View** to open it, or use the copy button to copy its address. |

Draft rows link to the Ghost editor rather than to the public address, since the post isn't live yet.

The **Actions** column always carries **Edit**, which opens the event in Outpost. Next to it sits **Create Draft Post in Ghost** while the event has no post, and **Edit in Ghost** once a post exists.

***

## Event lifecycle

Events transition automatically through three states based on dates and times:

<Steps>
  <Step title="Registration Open">
    The event date is in the future and the registration deadline (if set) hasn't passed. Members can RSVP.
  </Step>

  <Step title="Registration Closed">
    The registration deadline has passed but the event hasn't happened yet. New RSVPs are blocked.
  </Step>

  <Step title="Event Passed">
    The event date has passed and the end time (or start time, if no end time was set) has come and gone. The widget shows a past-event message.
  </Step>
</Steps>

***

## Attendee management

Once an event has registrations, the event detail page shows an **Attendees** section with:

* Member name and email
* Registration timestamp (`Registered At`)
* **Export CSV** button to download the attendee list (Name, Email, Registered At)

Each registration also carries an internal status (registered, cancelled, attended). Today the page shows registered attendees and removes the row when a member cancels. There is no per-attendee status badge or attendance-marking control in the UI yet.

***

## Calendar links

After registering, members see calendar buttons to add the event to their preferred platform:

* **ICS File Download** (Apple Calendar, Outlook desktop)
* **Google Calendar**
* **Outlook Web**
* **Yahoo Calendar**

Choose which platforms to display in **Event Settings → Default Messaging → Registered → Show calendar links**.

### What gets added to the calendar

Every platform receives the same core information, derived from the event you published:

| Calendar field  | Source                                                                                                                                                                                                       |
| --------------- | ------------------------------------------------------------------------------------------------------------------------------------------------------------------------------------------------------------ |
| **Title**       | `{Site Name}: {Event Name}`. Your site's name precedes the event title so members can spot the source at a glance when they have many events on their calendar.                                              |
| **Start / end** | The event's start and end times, converted to UTC. If you set a start time but no end time, the entry uses your site's **Default duration** (60 minutes by default).                                         |
| **Time zone**   | The per-event time zone if set, otherwise your site's time zone, then UTC as a final fallback.                                                                                                               |
| **Location**    | The event's location, or your site's **Default location** if the event has none.                                                                                                                             |
| **Description** | `From {Site Name}` followed by the event description (if one exists). The site attribution is always included, even when the event has no description text.                                                  |
| **Status**      | `CONFIRMED` (ICS only). Not exposed by the Google, Outlook Web, or Yahoo URL formats.                                                                                                                        |
| **Event link**  | A `URL:` line back to the event page on your site (ICS only). The Google, Outlook, and Yahoo handoff URLs don't include a separate link field; the description carries it instead if you reference it there. |

### ICS file specifics

The ICS download produces a standards-compliant file ([RFC 5545](https://datatracker.ietf.org/doc/html/rfc5545)) that Apple Calendar, Outlook desktop, Thunderbird, and other clients can import directly. Each entry includes:

```text theme={"theme":{"light":"github-light","dark":"github-dark"}}
BEGIN:VCALENDAR
VERSION:2.0
PRODID:-//Outpost//Events//EN
CALSCALE:GREGORIAN
METHOD:PUBLISH
BEGIN:VEVENT
DTSTART:<UTC start>
DTEND:<UTC end>
SUMMARY:<Site Name>: <Event Name>
LOCATION:<location>
DESCRIPTION:From <Site Name>\n\n<event description>
STATUS:CONFIRMED
UID:<event guid>@outpost
URL:<link back to the event page>
END:VEVENT
END:VCALENDAR
```

Carriage returns and other special characters in the site name, event name, location, and description are escaped per the RFC so the file always opens cleanly, even if a publisher pastes content with stray line breaks.

### Google, Outlook, and Yahoo handoffs

These three buttons don't generate a file; they open the platform's "create event" form pre-filled via URL parameters. Every form receives:

* The site-prefixed title (`{Site Name}: {Event Name}`).
* The event start and end times in UTC.
* The location.
* The description with the `From {Site Name}` attribution.

The exact URL parameters are:

| Platform | Endpoint                                       | Parameters                                                                |
| -------- | ---------------------------------------------- | ------------------------------------------------------------------------- |
| Google   | `calendar.google.com/calendar/render`          | `action=TEMPLATE`, `text`, `dates`, `details`, `location`                 |
| Outlook  | `outlook.live.com/calendar/0/deeplink/compose` | `path`, `rru=addevent`, `subject`, `startdt`, `enddt`, `body`, `location` |
| Yahoo    | `calendar.yahoo.com/`                          | `v=60`, `title`, `st`, `et`, `desc`, `in_loc`                             |

These platforms don't expose a separate `STATUS` or `URL` field via their compose URLs, so members get the title, time, location, and description; if you want the event page link to be discoverable from the calendar entry, include it in your event description.

***

## Ghost integration

### Publishing

When you publish an event from Outpost, a Ghost post is created (or updated) with:

* The event name as the post title.
* A placeholder body with a `<div class="outpost-ghost-event-container"></div>` element where the registration widget renders, plus the prompt "Put your event description here"; replace this with your own copy in Ghost.
* A JSON payload of event details in the post's `codeinjection_foot` for themes to read (date, time, access level, registration state).
* A custom post template if you've configured one in Event Settings or your theme manifest.
* The featured image uploaded to Ghost (uploaded once, on first sync).

### Automatic ordering

Ghost normally displays posts by publish date, not event date. Outpost bridges that gap by quietly adjusting event posts' publish dates so that publish-date order always matches event-date order. The reorder runs every time an event is published or its date changes, so an events listing in your theme needs no special sorting: Ghost's default publish-date ordering shows events in event-date order, with past events sinking below upcoming ones.

<Note>
  Because Outpost manages these publish dates, the dates themselves aren't meaningful: an event post can show a "published" date that has nothing to do with when you actually published it. Event post templates and event cards should hide the publication date and show the event date from the [code injection payload](/themes/data-formats) instead.
</Note>

### Theme support

Compatible Ghost themes (like Gazet) read event details from the `codeinjection_foot` payload to display event information, registration status, and sign-up buttons natively. The registration widget uses your AutoDisplay CTA design settings (accent colors, button styles, fonts).

<Warning>
  The widget needs the theme to render `codeinjection_foot` and to keep the placeholder `<div>` in the post body. If the theme strips foot code injection, or if the placeholder div is deleted in the Ghost editor, the widget won't appear.
</Warning>

***

## RSVP labels

When a member registers, Outpost adds two labels to their member record so you can segment and filter event attendees in both Outpost and Ghost.

The first is an RSVP label built from the event name and the month the event was created: an event named "Spring Webinar" created in March 2026 produces `ZZZ_RSVP_spring_webinar_2026_03`. Outpost writes this label into the event's **Extra Labels for Members Who Register (Optional)** field when you first save, so you can see it there and remove it if you would rather not use it.

The second matches the event's **Slug** field exactly, so an event with the slug `spring-webinar` gives every registrant the label `spring-webinar`.

The RSVP label is set once when the event is created. Renaming the event later does not update the label: existing registrants keep their original label, and new registrants receive the same label as everyone else on the event.

Every label the event carries, including any you added yourself, is removed automatically when a member cancels their registration.

***

## Event countdown

When an event has a date and start time configured, Outpost generates a live countdown displayed on the event page. The countdown adapts based on how far away the event is:

* **More than a day away**: shows days and hours (e.g., "3d 5h").
* **Less than a day**: shows hours and minutes (e.g., "2h 30m").
* **Less than an hour**: shows minutes only (e.g., "45m").

The countdown disappears once the event start time has passed. It respects the event's configured time zone.

***

## Event settings

Open global event defaults by clicking the **Settings** button on the Events list page.

| Setting                                | Description                                                                                                                                                                       |
| -------------------------------------- | --------------------------------------------------------------------------------------------------------------------------------------------------------------------------------- |
| **Default Tags**                       | Ghost tags added to event posts. Multi-select: pick any number of tags. These drive routing, so they are usually something like #event or #webinar.                               |
| **Default Post Template**              | Custom Ghost post template for event pages. See [Default Post Template](#default-post-template) below.                                                                            |
| **Default Featured Image Size**        | Width and height in pixels, up to 4000 each. Featured images are cropped to these dimensions before being published, and the size shows as the recommendation on the upload form. |
| **Use same design as AutoDisplay CTA** | Under **Design & Display**. The registration widget inherits accent colors, button styles, and fonts from your CTA design settings. Always on.                                    |
| **Default duration**                   | Under **Event Defaults**. Used when an event has a start time but no end time. 60 minutes by default, and anywhere from 15 to 720.                                                |
| **Default location**                   | Under **Event Defaults**. Used when an event doesn't have its own location set. Up to 255 characters.                                                                             |
| **Default timezone**                   | Under **Event Defaults**. Read-only: events default to your site's time zone, which you set on [Publication Details](/features/publication-details).                              |
| **Calendar Platforms**                 | Under **Default Messaging → Registered**, shown once **Show calendar links** is on. Which calendar link buttons appear after registration.                                        |

Values under **Event Defaults** fill in automatically when you create a new event, and you can override any of them on an individual event. Event email settings live in the same drawer, under **Event Emails**: see [Event emails](#event-emails).

### Default Post Template

The dropdown lists the custom templates Outpost read from the theme you uploaded through the [Theme Connect Wizard](/getting-started/theme-connect-wizard). Outpost re-reads your theme each time you open Event Settings, so a template from a theme you uploaded a moment ago appears as soon as you close and reopen the drawer.

You can also type a name yourself. Enter the file name without the `.hbs` extension, so `custom-event-post.hbs` is entered as `custom-event-post`. If your theme has no custom templates, the dropdown reads "No templates found in your theme. Refresh your theme or type a template name."

### Default messaging

Event Settings includes customizable messaging templates for each audience state:

| State                     | When it shows                                                                     |
| ------------------------- | --------------------------------------------------------------------------------- |
| **Can Register**          | Eligible member who hasn't registered yet.                                        |
| **Login Required (Free)** | Guest visitor on a free event.                                                    |
| **Login Required (Paid)** | Guest visitor on a paid event.                                                    |
| **Upgrade Required**      | Free member viewing a paid event.                                                 |
| **Registered/Confirmed**  | Member who has RSVP'd: includes calendar links, share options, and cancel button. |
| **Registration Closed**   | Anyone viewing after the deadline.                                                |
| **Event Passed**          | Anyone viewing after the event.                                                   |

Each state has configurable text and toggles. Per-event overrides take priority over site-level defaults.

***

## Event emails

Outpost can send emails to registrants at key moments in the event lifecycle. Event emails are managed through the [Basic Autoresponder](/features/basic-autoresponder) and use the same template system as other autoresponder actions.

### Enabling event emails

Event emails are controlled at two levels:

1. **Site-level switch**: **Enable event emails** in **Event Settings** turns event emails on or off for your whole publication. Switching it on turns on all six event emails in the [Basic Autoresponder](/features/basic-autoresponder), even ones you had switched off there, and switching it off turns them all off. Saving any other event setting leaves your Autoresponder choices alone.
2. **Per-event override**: Individual events can disable emails even when the site-level switch is on. Useful for informal events where you don't want automated notifications.

### Email types

| Email                | When it sends                                            | Recipient              |
| -------------------- | -------------------------------------------------------- | ---------------------- |
| **Confirmation**     | Immediately when a member registers.                     | Registrant             |
| **Reminder 1**       | Configurable hours before the event (default: 24 hours). | All registered members |
| **Reminder 2**       | Configurable hours before the event (default: 2 hours).  | All registered members |
| **Event Updated**    | When event details change after members have registered. | All registered members |
| **Event Cancelled**  | When an event is cancelled.                              | All registered members |
| **Post-Event Recap** | After the event ends (within 3 days).                    | Publisher/staff        |

<Note>
  Confirmation emails send regardless of a member's email opt-out preference: they're transactional. Reminder emails respect the member's email preferences and will not send to members who have opted out.
</Note>

### Reminder configuration

Reminders are set at the site level in **Event Settings** and can be overridden per event:

| Setting                 | Default | Description                                                     |
| ----------------------- | ------- | --------------------------------------------------------------- |
| **Number of reminders** | 2       | How many reminder emails to send before each event: 0, 1, or 2. |
| **First reminder**      | 24      | Hours before the event, anywhere from 1 to 168.                 |
| **Second reminder**     | 2       | Hours before the event, anywhere from 1 to 168.                 |

Reminders run on an hourly schedule with a 3-hour send window. The window is asymmetric: a reminder configured for "24 hours before" can fire any time from 25 hours to 22 hours before the event start.

### Tracked fields for the update email

Outpost watches six fields and prompts you to send the **Event Updated** email if any of them change after registrations exist:

* Event Date
* Start Time
* End Time
* Time Zone
* Location
* Event Platform URL

The update prompt tells you which fields changed and how many registrants would be notified, so you can decide whether to send.

### Customizing event email templates

Each event email has its own template in the Basic Autoresponder. Templates support event-specific merge tags:

| Merge tag                  | What it inserts                                       |
| -------------------------- | ----------------------------------------------------- |
| `%EVENT_NAME%`             | The event name.                                       |
| `%EVENT_DATE%`             | The event date.                                       |
| `%EVENT_TIME%`             | The start time (and end time when set).               |
| `%EVENT_LOCATION%`         | The location field.                                   |
| `%EVENT_JOIN_LINK%`        | The Event Platform URL.                               |
| `%EVENT_DESCRIPTION%`      | The short description.                                |
| `%EVENT_URL%`              | Link to the event page on your Ghost site.            |
| `%EVENT_CALENDAR_GOOGLE%`  | Add-to-Google-Calendar link.                          |
| `%EVENT_CALENDAR_ICS%`     | ICS file download link.                               |
| `%EVENT_CALENDAR_OUTLOOK%` | Outlook Web add-to-calendar link.                     |
| `%EVENT_CALENDAR_YAHOO%`   | Yahoo Calendar add-to-calendar link.                  |
| `%EVENT_CANCEL_LINK%`      | Link the member can use to cancel their registration. |

<Note>
  Event templates also support the standard member, site, and subscription merge fields, plus fallback syntax for empty values like `%SUBSCRIBER_FIRST_NAME%,fallback="there"`. See [Email templates](/features/email-templates#merge-fields) for the full reference.
</Note>

Edit templates in **Autoresponder > Basic**: event email actions appear alongside other autoresponder actions. Each reminder shows its site-level timing there as the number of hours before the event, or as **Off** when **Number of reminders** means that reminder never sends. Per-event overrides are not reflected in that row. The timing itself is changed in Event Settings, not in the Autoresponder.

***

## Related features

<CardGroup cols={2}>
  <Card title="Event Creator" icon="calendar-plus" href="/features/event-creator">
    Create reusable event HTML widgets to embed in Ghost posts.
  </Card>

  <Card title="Theme Connect Wizard" icon="wand-magic-sparkles" href="/getting-started/theme-connect-wizard">
    Connect your Ghost theme to enable event widgets and other Outpost features.
  </Card>

  <Card title="Labels" icon="tags" href="/features/labels">
    RSVP labels are auto-applied when members register for events.
  </Card>

  <Card title="Basic Autoresponder" icon="envelope" href="/features/basic-autoresponder">
    Configure event email templates and reminder timing.
  </Card>
</CardGroup>

***

## FAQ

<AccordionGroup>
  <Accordion title="What's the difference between Events and Event Creator?">
    **Events** (this page) creates full Ghost-integrated events with registration, attendee tracking, and lifecycle management. **Event Creator** is a simpler tool for creating reusable event HTML widgets that you paste into Ghost posts: no registration or attendee tracking.
  </Accordion>

  <Accordion title="Can I limit the number of registrations?">
    Yes. Set the **Max Attendees** field when creating an event. Once the cap is reached, new registrations are blocked.
  </Accordion>

  <Accordion title="How do I export my attendee list?">
    Open the event detail page, scroll to the Attendees section, and click **Export CSV**. The export includes name, email, and registration timestamp.
  </Accordion>

  <Accordion title="Do events work with any Ghost theme?">
    The registration widget works on any theme as long as the theme renders `codeinjection_foot` and the placeholder `<div class="outpost-ghost-event-container"></div>` is left in the post body. Themes specifically built for Outpost (like Gazet) provide richer event rendering using the metadata Outpost injects.
  </Accordion>

  <Accordion title="What happens if I change the event date after publishing?">
    Outpost updates the Ghost post and reorders all event posts so they display in chronological event-date order. If event emails are enabled and members have registered, Outpost detects the change and offers to send an update notification to all registrants.
  </Accordion>

  <Accordion title="Why did my event post's publish date change?">
    That's Outpost keeping your events in order. Ghost sorts posts by publish date, so Outpost automatically adjusts event posts' publish dates to match the order of their event dates. The reorder runs whenever any event is published or has its date changed. It's harmless, but it means the publish date on an event post isn't meaningful; themes should hide the publication date on event posts and show the event date instead.
  </Accordion>

  <Accordion title="Why don't my theme's custom templates show up in Default Post Template?">
    The dropdown lists the custom templates Outpost read from the theme you uploaded through the [Theme Connect Wizard](/getting-started/theme-connect-wizard). Outpost re-reads your theme every time you open Event Settings, so closing the drawer and opening it again picks up a theme you uploaded a moment ago. A full page reload is no longer needed. If your theme has no custom templates at all, the dropdown reads "No templates found in your theme. Refresh your theme or type a template name." You can always type a name yourself: enter the file name without the `.hbs` extension, so `custom-event-post.hbs` is entered as `custom-event-post`.
  </Accordion>

  <Accordion title="How do I enable event emails?">
    Go to **Event Settings** and turn on **Enable event emails**. That one switch turns on all six event emails in the [Basic Autoresponder](/features/basic-autoresponder), including any you had switched off there. You can still disable emails for individual events without turning off the site-wide setting.
  </Accordion>

  <Accordion title="Can I customize the reminder timing?">
    Yes. The default is two reminders: 24 hours and 2 hours before the event. You can change the timing and the count (0, 1, or 2) in Event Settings, and override these settings on individual events.
  </Accordion>

  <Accordion title="Will members who opted out of emails still get event confirmations?">
    Yes. Confirmation emails are transactional and send regardless of email preferences. Reminder emails respect opt-out preferences and won't go to members who have unsubscribed.
  </Accordion>
</AccordionGroup>