> ## Documentation Index
> Fetch the complete documentation index at: https://documentation.outpost.pub/llms.txt
> Use this file to discover all available pages before exploring further.
# Staff
> Manage admin users, invitations, and two-factor authentication for your Outpost account.
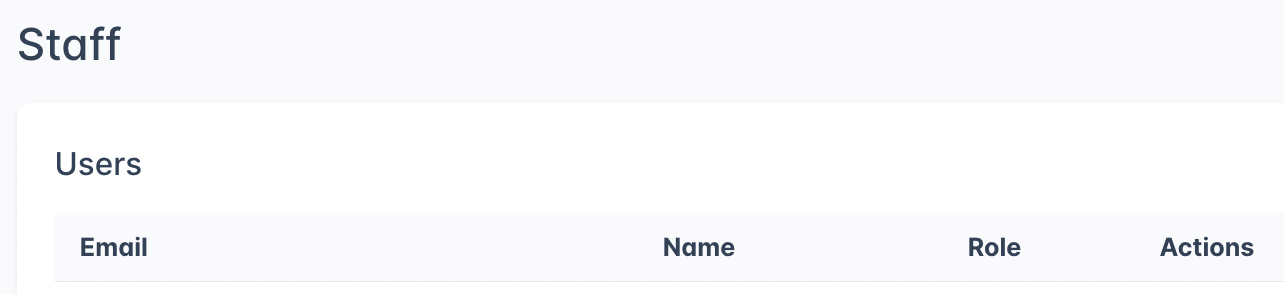
The Staff page lets you manage who has access to your Outpost account. You can view current users, change roles, edit user details, and invite new admin users.
 ***
## Users
The users table shows everyone with access to your Outpost account:
| Column | Description |
| --------- | ----------------------------------- |
| **Email** | The user's email address. |
| **Name** | The user's display name. |
| **Role** | Either **Site owner** or **Admin**. |
### Roles
Outpost has two roles for staff users:
| Role | Permissions |
| -------------- | ----------------------------------------------------------------------------------------------------------------------------------------------------------------------- |
| **Site owner** | Full access to all settings, billing, and account management. Only one owner per site. The owner cannot be removed. |
| **Admin** | Full access to all features except billing and account deletion. Admins can manage members, email flows, CTAs, integrations, and all day-to-day publication operations. |
Both roles can view and edit members, create email campaigns, configure automations, and manage content. The key difference is that only the Site owner can access billing settings and delete the account.
### User actions
Each user row in the table has action buttons:
***
## Users
The users table shows everyone with access to your Outpost account:
| Column | Description |
| --------- | ----------------------------------- |
| **Email** | The user's email address. |
| **Name** | The user's display name. |
| **Role** | Either **Site owner** or **Admin**. |
### Roles
Outpost has two roles for staff users:
| Role | Permissions |
| -------------- | ----------------------------------------------------------------------------------------------------------------------------------------------------------------------- |
| **Site owner** | Full access to all settings, billing, and account management. Only one owner per site. The owner cannot be removed. |
| **Admin** | Full access to all features except billing and account deletion. Admins can manage members, email flows, CTAs, integrations, and all day-to-day publication operations. |
Both roles can view and edit members, create email campaigns, configure automations, and manage content. The key difference is that only the Site owner can access billing settings and delete the account.
### User actions
Each user row in the table has action buttons:
 #### **Edit**
 Opens a dialog where you can change the user's email address or name. Click **Save** to apply changes.
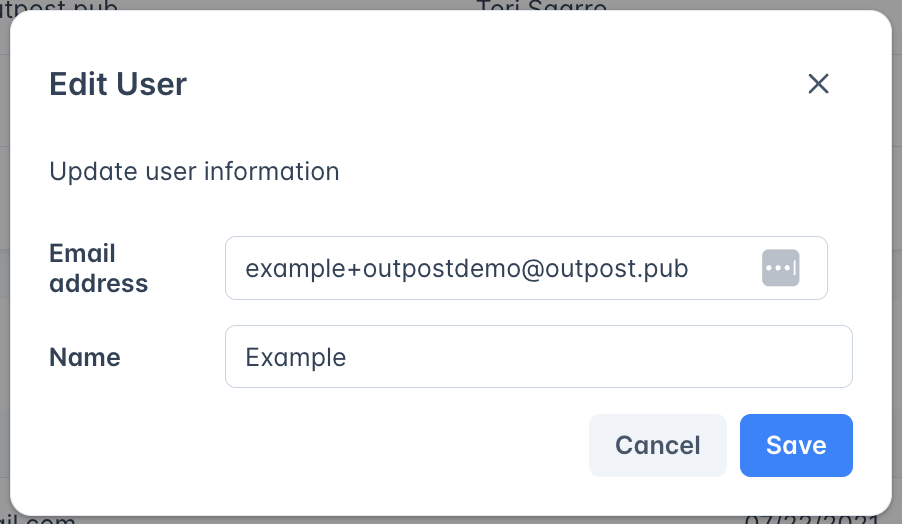 To update your own name or email, find your row in the Users table and click **Edit**. The same dialog used for editing other users lets you change your own details.
#### **Remove**
Remove this admin user's access to the account. Only visible for admin users (the site owner cannot be removed). A confirmation dialog will appear before removal.
To update your own name or email, find your row in the Users table and click **Edit**. The same dialog used for editing other users lets you change your own details.
#### **Remove**
Remove this admin user's access to the account. Only visible for admin users (the site owner cannot be removed). A confirmation dialog will appear before removal.
 #### **Set as owner**
Transfer site ownership to this admin user. Only visible for admin users, and only the current owner can perform this action. A confirmation dialog will appear before the transfer.
Only the current site owner can transfer ownership. To transfer:
1. Find the admin user you want to make the new owner in the Users table
2. Click **Set as owner** next to their name
3. Confirm the transfer in the dialog that appears
4. Ensure your Stripe account has the same owner
After the transfer, you will become an Admin and the other user becomes the Site owner. This gives them access to billing settings and account-level controls.
Transferring ownership cannot be undone by you. Only the new owner can transfer it back. Be sure.
***
## Invitations
When you invite a new admin, the invitation appears in a separate **Invitations** table below the users table. This table only appears when there are pending invitations.
| Column | Description |
| --------- | ----------------------------- |
| **Email** | The invited email address. |
| **Date** | When the invitation was sent. |
### Invitation actions
#### **Set as owner**
Transfer site ownership to this admin user. Only visible for admin users, and only the current owner can perform this action. A confirmation dialog will appear before the transfer.
Only the current site owner can transfer ownership. To transfer:
1. Find the admin user you want to make the new owner in the Users table
2. Click **Set as owner** next to their name
3. Confirm the transfer in the dialog that appears
4. Ensure your Stripe account has the same owner
After the transfer, you will become an Admin and the other user becomes the Site owner. This gives them access to billing settings and account-level controls.
Transferring ownership cannot be undone by you. Only the new owner can transfer it back. Be sure.
***
## Invitations
When you invite a new admin, the invitation appears in a separate **Invitations** table below the users table. This table only appears when there are pending invitations.
| Column | Description |
| --------- | ----------------------------- |
| **Email** | The invited email address. |
| **Date** | When the invitation was sent. |
### Invitation actions
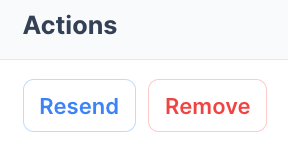 * **Resend**: Re-send the invitation email. Resend restarts the 72-hour expiration window from the moment the new email is sent.
* **Remove**: Cancel the pending invitation. The invite link will no longer work.
Invitation links expire 72 hours after the invitation is sent. If a user doesn't accept in time, click **Resend** to issue a new link.
***
## Inviting a new admin
* **Resend**: Re-send the invitation email. Resend restarts the 72-hour expiration window from the moment the new email is sent.
* **Remove**: Cancel the pending invitation. The invite link will no longer work.
Invitation links expire 72 hours after the invitation is sent. If a user doesn't accept in time, click **Resend** to issue a new link.
***
## Inviting a new admin
 To add a new team member to your Outpost account:
1. Click the **Invite Admin User** button below the users table
2. In the dialog that appears, enter the person's email address
3. Click **Send**
The invited user receives an email with a link to set up their account. Once they accept the invitation and create their account, they appear in the Users table with the **Admin** role.
Invited users must complete the account setup process, which includes setting a password and configuring two-factor authentication, before they can access your Outpost account.
***
## Two-factor authentication (2FA)
Outpost requires all users to set up two-factor authentication for account security. During initial login setup, each user chooses one of two verification methods:
### Authentication app (recommended)
1. Download a free authenticator app on your mobile device, such as Authy or Google Authenticator
2. Open the app and choose **Add New Account**
3. Scan the QR code displayed on screen, or manually enter the setup code shown below it
4. Click **Continue** to complete setup
Each time you log in, you will be prompted to enter the current 6-digit code from your authenticator app.
### Text message (SMS)
1. Enter your mobile phone number
2. Click **Send Code** to receive a verification code via text message
3. Enter the code to complete setup
Each time you log in, a new code will be sent to your phone number on file.
Authentication apps are more secure than SMS because they are not vulnerable to phone number hijacking. We recommend using an authenticator app whenever possible.
After verifying, Outpost remembers the device for one month before prompting for a second factor again.
If you need to switch your 2FA method, a **Use a different method** link is available on the verification screen to return to the method selection page.
***
## Transferring site ownership
See [Set as owner](#set-as-owner) under User actions. Only the current site owner can transfer ownership, the transfer moves billing and account-deletion access to the new owner, and your Stripe account needs to match whoever owns the site.
***
## Related features
Manage your site settings and Outpost subscription.
Configure which events trigger email notifications for your team.
***
## FAQ
There is no limit on the number of admin users. Invite as many team members as needed.
Yes. The current site owner can click **Set as owner** next to any admin user to transfer ownership. This cannot be undone without the new owner transferring it back.
The user immediately loses access to your Outpost account. Their actions and data are not deleted; they simply can no longer log in.
Yes. All Outpost users must set up 2FA during their first login. You can choose between an authenticator app or SMS verification. After verifying, Outpost remembers the device for one month before prompting again.
Yes. On the 2FA verification screen, click the **Use a different method** link to switch between the authenticator app and SMS options.
Both roles have full access to manage members, email flows, CTAs, and integrations. The Site owner additionally has access to billing settings and account deletion. There can only be one Site owner at a time.
To add a new team member to your Outpost account:
1. Click the **Invite Admin User** button below the users table
2. In the dialog that appears, enter the person's email address
3. Click **Send**
The invited user receives an email with a link to set up their account. Once they accept the invitation and create their account, they appear in the Users table with the **Admin** role.
Invited users must complete the account setup process, which includes setting a password and configuring two-factor authentication, before they can access your Outpost account.
***
## Two-factor authentication (2FA)
Outpost requires all users to set up two-factor authentication for account security. During initial login setup, each user chooses one of two verification methods:
### Authentication app (recommended)
1. Download a free authenticator app on your mobile device, such as Authy or Google Authenticator
2. Open the app and choose **Add New Account**
3. Scan the QR code displayed on screen, or manually enter the setup code shown below it
4. Click **Continue** to complete setup
Each time you log in, you will be prompted to enter the current 6-digit code from your authenticator app.
### Text message (SMS)
1. Enter your mobile phone number
2. Click **Send Code** to receive a verification code via text message
3. Enter the code to complete setup
Each time you log in, a new code will be sent to your phone number on file.
Authentication apps are more secure than SMS because they are not vulnerable to phone number hijacking. We recommend using an authenticator app whenever possible.
After verifying, Outpost remembers the device for one month before prompting for a second factor again.
If you need to switch your 2FA method, a **Use a different method** link is available on the verification screen to return to the method selection page.
***
## Transferring site ownership
See [Set as owner](#set-as-owner) under User actions. Only the current site owner can transfer ownership, the transfer moves billing and account-deletion access to the new owner, and your Stripe account needs to match whoever owns the site.
***
## Related features
Manage your site settings and Outpost subscription.
Configure which events trigger email notifications for your team.
***
## FAQ
There is no limit on the number of admin users. Invite as many team members as needed.
Yes. The current site owner can click **Set as owner** next to any admin user to transfer ownership. This cannot be undone without the new owner transferring it back.
The user immediately loses access to your Outpost account. Their actions and data are not deleted; they simply can no longer log in.
Yes. All Outpost users must set up 2FA during their first login. You can choose between an authenticator app or SMS verification. After verifying, Outpost remembers the device for one month before prompting again.
Yes. On the 2FA verification screen, click the **Use a different method** link to switch between the authenticator app and SMS options.
Both roles have full access to manage members, email flows, CTAs, and integrations. The Site owner additionally has access to billing settings and account deletion. There can only be one Site owner at a time.